Wednesday, January 16, 2013

Chicken Stock

This post should have gone up yesterday, but here it is today. I guarantee making your own chicken stock will have multiple benefits:
- you'll save lots of money
- your chicken stock will taste better
- your cooking options will expand
- your guests will be impressed
- you'll feel satisfied knowing you didn't let anything go to waste

Now, remember that Roast Chicken from earlier in the week? Time to use it (and really you should do this step within 24 hours of making the Roast Chicken.) Take the leftover chicken and remove as much meat from the bones as you possibly can. Depending on how many people you fed/how much you ate when you first made the Roast Chicken, you will get anywhere between 1-4 cups of chicken.

Put the chicken in a sealed container in a cold part of the fridge, we're using it in a couple nights for Indian Food - Chicken Tikka Masala, to be exact. If you have more chicken leftover than what is called for in that dinner, put it in a ziplock bag and place it in the freezer. We'll use it within the next couple weeks.

Now, all the non-meat bits of the chicken? Yes ALL of them - toss them in a pot. If your Roast Chicken turned out the same way mine did, you should have several cups of broth left in the bottom of your stock pot. Add the non-meat chicken bits to that broth. You can literally add everything - the bones, any innards, any skin, any leftover garlic/carrots/potatoes clinging to the chicken. Add approximately 8 cups of water and place on the stove on medium heat, once it reaches a bowl, reduce heat to low and let stock simmer for about an hour.

Turn off the stove and let the stock cool to room temperature. Pour the stock into containers with tight sealing lids (preferably glass - being sure to leave an inch or two at the top for expansion, otherwise your jars will explode in the freezer. Bummer) and place in the freezer. I find it useful to freeze the stock in jars of various sizes so I can thaw an appropriate amount for the right recipe. Canning jars work incredibly well, as do any glass jars. I also sometimes use washed out juice cartons (plastic ones) to store a larger quantity of stock.

From this chicken, I pulled enough chicken for 3 meals and made 12 cups of stock.

Now that is a well used $6 chicken.

As a side note - feel free to add any other veggies or seasoning to your stock. Popular options include celery (or celery leaves), carrots, onions, garlic, salt, and/or pepper. Have fun!

Tuesday, January 15, 2013

Palak Paneer, Naan, & Chicken Tikka Masala

Here's why you should follow this a week behind me, and not try and do this on the same timeline - I changed the meal plan tonight.

I followed one piece of my own advice (cook to what you have in your kitchen) because I didn't follow all of my other advice, and didn't have all the ingredients on hand I needed :) Oops.

The result of the change was fantastic, though, and we'll do butter chicken another time.

Ok, here's the deal - this entry could take me hours. I mean, hours. But I'm not up for hours of writing, so here's what I'll do - I'm including the 5 recipes you need to make this meal, and a couple pics. If/when I make this again, I'll clean this entry up a bit, and add some more pictures.

These recipes are inspired by Shubhra Ramineni's Entice with Spice . If you're looking to get into Indian cooking - this is the cookbook to start with. My other sister-in-law got this cookbook for me that Christmas I was telling you about...it's a great book.

Do ahead prep specific for this meal
* all your chopping - garlic, onions, ginger. Chop it as much as a day before
* spice measuring - when making Indian food, I often get a little bowl and measure out all the spices needed for each dish. Label them - no, seriously - label them, and then when you're actually combining your ingredients, you can just pick up your bowl of spices and toss them in. This saves an immense amount of time when you're actually cooking, because you aren't messing with bottles and bottles of spice.
* The Naan dough needs 5 hours to sit - you can cook them ahead of time and rewarm them, so if you work/won't be home until just before dinner time, consider making them ahead of time.
* Indian food reheats incredibly well - don't be afraid to make any of these dishes in their entirety 24 hours before you need them. They'll just taste better.

With no further ado - your recipes (in order of most efficient cooking if making them all at once) - 

Naan 


{I doubled this entire recipe, as the actual rolling/baking part is short, and the other dishes produce leftovers.}

1 1/4 c flour
1/4 tsp dry active yeast
1/4 tsp salt
2 tsp plain yogurt
1 Tbs oil, plus extra for brushing
1/4 c- 1/2 c warm water

Combine dry ingredients in a bowl, then add the wet ingredients. Knead thoroughly until all ingredients are mixed well.

Form dough into a ball and put in a greased container. Cover and put in a warm place for 5 hours to allow to rise - dough should almost double in size.

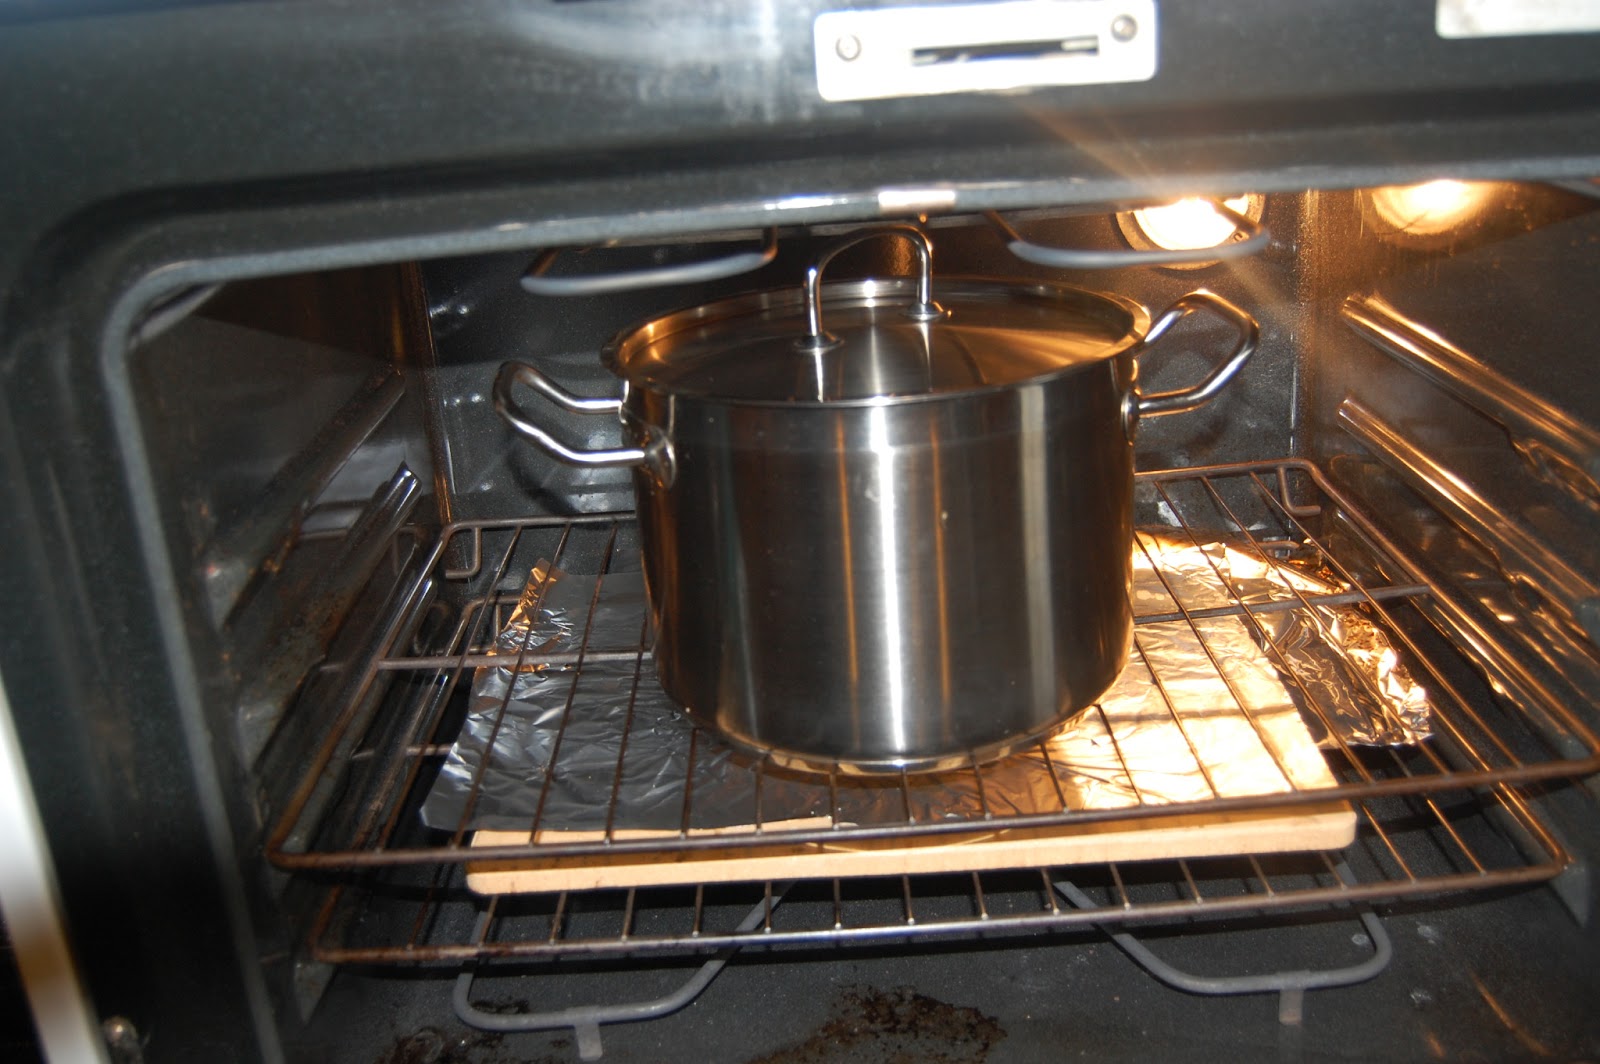
Once the dough has risen, place a baking sheet (preferably a baking stone) on the top shelf of the oven, and preheat oven to 500F. If you are using a baking stone, I recommend covering with foil to help protect your baking stone.

Remove the dough from a bowl and separate into 4 equal pieces. Roll each piece out into an oval shape - approx 8 in by 4 in.

Remove the baking sheet from the oven (if you're using a baking stone - I recommend just pulling the rack part way out of the oven - you don't want to risk dropping a hot baking stone on the floor, or in my case - a 2yr old) and place the rolled out naans on the sheet. The naan will puff up about 2 inches, but won't spread out, so you can put them close together.

Turn the oven from bake to broil and close the oven. Bake for about 3 minutes, though it could be dramatically less depending on the closeness of your top rack to your broiler, heat of your oven, thickness of your naan, etc - watch carefully to avoid burning.

Remove the naan from the oven, spread with oil or butter (and a little garlic if you like), wrap in foil until dinner is ready to serve.

Don't worry if your naan are a bit crunchy when they come out of the oven, they'll soften with the added butter/oil and being wrapped in foil.

Enjoy!

Palak Paneer 

This recipe is fantastic, but requires some pre-work - making cheese. It's incredibly easy, here you go (again from Entice with Spice)

Paneer

4 c whole milk
2 tsp lime or lemon juice
{that's your ingredients list - still intimidated?}

Pour the milk into a large saucepan, making sure pan is not too full as milk will bubble up.

Bring the milk to a boil, watching carefully to make sure milk doesn't boil over out of the saucepan. Once the milk reaches a boil, add the lemon juice, reduce the heat, and stir until the milk separates. 
Remember hearing about 'curds and whey'? Here they are! The curds are the chunky bits, the whey is the watery bit left behind. The lemon/lime juice (vinegar is a good substitute, if necessary) cause the milk to curdle, separating the two - amazing!

**If you have toddlers, this is an excellent process for them to watch!

Once the curds and whey have separated, remove the saucepan from the stove. Line a strainer/colander with cheesecloth or a thin tea towel (flour sack tea towels work beautifully and are an amazing addition to a kitchen in general). Pour all of the contents of the saucepan into the lined colander/strainer - catching the curds as the whey goes through. Let the liquid continue to drain out for about a minute.


Gather the cloth around the cheese, and press against the side of the colander to press out any extra liquid. Unwrap the cheese and shape into a neat block - square or circle, doesn't matter, just tuck in all the loose bits. Rewrap with the cheese cloth and set on a plate, with some weight on top (a heavy bowl, perhaps?) to drain out any extra weigh - leave for 1-2 hours.


Remove cheese from the cloth and put in the fridge in an airtight container until you need it. For the recipe we're making, I recommend cutting the cheese into cubes, and pan-frying it in a skillet until browned.

Sauce for Palak Paneer 


1 large bag baby spinach
2 ripe tomatoes, diced
1/2 small sweet onion, diced
1/2 tsp turmeric
1/8 tsp cayenne epper
1/2 tsp salt
1/2 tsp pepper
3Tbs butter
1 1/2 tsp grated giner
1/2 c plain yogurt (you can use heavy cream, but yogurt makes this recipe healthier)
1/2 tsp masala (you can omit this, if you like)

In a skillet, saute the spinach, onions, and tomatoes in 1Tbs oil. Stir until the tomatoes have cooked down and are quite soft. Remove from heat and put in a blender (or, if you have an immersion blender, transfer to a stainless steel sauce pan). Add ginger and all other spices. Blend until you have a thick paste/sauce. If needed, transfer to a sauce pan - return saucepan to the stove and place over medium heat. Add 3 Tbs butter and 1/2 c plain yogurt. Stir well in order to blend all the ingredients. Add cheese you made earlier and mix well - taking care not to break up the cheese. Serve immediately or remove from heat and store in the fridge for up to 2 days. Yummy!


Chicken Tikka Masala

Alright - this dish is amazing. I mean amazing. Wanna know what's even more amazing? We're using the chicken from earlier this week. That's right, I never told you what to do with the rest of that chicken did I? Well, I'll put in an entry tomorrow on Chicken Stock - but bottom line is this - remove all the meat from your leftover roast chicken and keep it in the fridge, we're using it tonight!

Sauce:
4 Tbs olive oil
2 clove garlic
2 tsp lime juice
1/4 tsp ground nutmeg
1/4 tsp ground coriander
3/4 tsp paprika
1/4 tsp cayenne
3/4 tsp salt
4 Tbs plain yogurt
2 cups chicken, cut into bite size

Combine all ingredients in a bowl, mix well and let marinate for 2-12 hours (depending on your schedule and availability - yeah for flexibility!). Remove and put on baking sheet lined with foil or baking rack. Heat oven to 400F, pour chicken onto baking sheet and spread out evenly - place in oven and cook for 15minutes, until slightly browned.

Masala Sauce 

Saute:
3Tbs vegetable oil
2 tsp fresh ginger, finely chopped
1 medium sweet onion, finely chopped
1 ripe tomato, chopped

Combine in a small bowl:
1/2 tsp cumin
1/2 tsp coriander
1 tsp parika
1/2 tsp cayenne pepper
3/4 tsp salt
1 1/2 tsp sugar
1 tsp cinnamon

Remove the sauteed onion, ginger, and tomato from the stove and blend - using a traditional blender or an immersion blender. Return sauce to saucepan, add spices.

Add to above sauce:
3Tbs butter
1/4 c plain yogurt
2 cups chicken mentioned above.

Mix thoroughly. Heat to simmering.

Serve immediately, or store in an airtight container in the fridge until you're ready to use it. It should keep for 3-5 days.

Enjoy!

So - there you go - Indian cooking at its finest. This really is a delicious meal, and makes great leftovers! I also served this with some plain rice, which is a nice addition to any sauce-based meals.

One tip for cooking this meal -
Prep the Palak Paneer and Chicken Tikka Masala as much as possible in advance; the naan take a lot of focus when they actually go in the oven, and frantically running around trying to finish all 4 dishes at once will be pretty stressful. Try and get the first two dishes done, and your rice started, before you start baking the naan. Then - when your naan is done, dinner can just be transferred to the table, hopefully reducing your stress.

I'd love to hear how this goes! Let me know if you give this a shot - I'm sure it'll be fabulous! If you're intimated by attempting the whole meal - find your favorite Indian place, order take-out (minus one of your regular dishes), and make just one of these dishes.


Monday, January 14, 2013

Roasted Root Vegetable Salad with Lemon-Dijon Vinaigrette

Whew! Last nights post exhausted me, I mean - exhausted me. So, tonight's will be much shorter.

Tonight is salad night, and I picked a new salad recipe from The Rodale Wholefood Cookbook and made a few changes. It's an amazing cookbook, given to me a few years ago when I asked for cookbooks for Christmas (warning, if you ask for cookbooks for Christmas, they will come - I think I got 12 cookbooks that year. All great cookbooks, but still - 12 cookbooks.) If you're looking for one cookbook to round out your whole kitchen, Rodale Wholefood Cookbook is for you.

Alright - here's the recipe:


Roasted Root Vegetable Salad 

6 baby carrots, cut into matchsticks (2 grown up carrots)
1 russet potato, cubed
2 sweet potatoes, cut into matchsticks
4 shallots, halved (1/4 yellow onion, sliced thinly & separated)
1 Tbs olive oil
3 cups arugula (mixed greens - no arugula at the store, sad)
Lemon-Dijon Vinaigrette
Salt & Pepper
1/2 c crumbled feta cheese

Preheat the oven to 475F

In a large bowl, combine the carrots, potatoes, parsnips, and shallots. Drizzle with the oil and toss well to coat. Transfer to a rimmed baking sheet and roast for 30 minutes, or until tender. Let cool to room temperature.

In a salad bowl, toss the arugula and root vegetables with the dressing. Seasons with salt and pepper to taste. Serve sprinkled with feta.


Ok - before you say "ok, that is totally not the same recipe - almost every major ingredient was substituted with something else" - let me say, You're right, it is. And here's my point - I substituted with what I had on hand, what was most accessible at my nearest market, and what was closest to the original recipe out of those options. Now, if I had used green beans and beets in this salad, it would absolutely not be the same (though I think roast beets would be a great addition...).

Tips for Cooking! Part of being a great cook is being comfortable substituting in your available/preferred ingredients in lieu of an ingredient listed in the original recipe. Cooking exactly to the recipe is a great way to spend lots of extra money making that one dish with those 6 random, absurdly expensive ingredients, or a lot of extra time hunting down arugula when you live in Tinyville. A happy cook, a financially stable cook, is a good cook (or at least a better one than their alternative).

Alright - back to the Salad Dressing, recipe based on Rodale.

Lemon-Dijon Vinaigrette
Makes generous 1/4 cup

2 Tbs lemon juice
1/2 Tbs apple cider vinegar
2 tsp Dijon mustard
1/4 tsp coarse salt
6 Tbs extra-virgin olive oil (I think my olive oil is less virgin than some...but, I'm not judging)

In a small bowl, whisk together the lemon juice, vinegar, mustard, salt, and pepper. Slowly whisk in the oil.

And there you have it, there you go. From the nibbles I've had (waiting for the kids to go to bed so the hubby and I can have an "in date night" after he put in a 12 hour work 'weekend' this past weekend) this salad is amazing! We'll probably repeat it later this year with some other roasted yummies on top (beets and walnuts, anyone?)

Alright, off to post this so I can tuck in my babies and be with the hubs. Enjoy!

Sunday, January 13, 2013

Roast Chicken with Root Veggies


This meal is one of my favorites - it will impress your guests to no end, and takes almost no effort (I just finished writing the post - 'no effort' is a lie, but 'less effort than you think' might be true...). Before you start thinking "it looks like mini-Thanksgiving!" let me reassure you, chicken is much easier to cook than a Thanksgiving bird - namely because of the size. It doesn't take nearly as long to prep or bake and is much less cumbersome.


So - let's get started! Before we do, let me explain one thing about this Year of Cooking - I think one reason a lot of people don't like to cook is not because they don't like to eat, not because it takes too much time, and not because they can't find or follow a recipe. I think people don't like to cook largely because it takes them so much time, and always creates such a mess. I hate that about cooking, too! Subsequently, throughout this series, I'll give tips for quicker, neater cooking - being a good cook is not just about the dish you produce, it's also about the way you run your kitchen. A well run kitchen makes cooking enjoyable! Immensely!

Tip for quick cooking - get all of your ingredients gathered before you start cooking. More importantly, and yes seriously, more importantly - start with a clean kitchen. Mess on top of mess adds to stress, accidents, and slow-downs when that perfect spoon is still dirty from yesterday. And, if you feel so inclined, try to clean as you go - dirty dishes straight in the sink, ingredients put away as they are used, etc - it makes the clean up easier, and your cooking process less cluttered. At least - that's what I've found.

A couple pre-cooking tips specific for this recipe:
* take the chicken out of the fridge a couple hours before you're ready to put it in the oven, (no more than 2hrs before - poultry diseases are nothing to mess around with). An hour or two will help the meat come to room temperature, which will make it more pleasant to work with, and reduce cooking time.
* chop the potatoes, carrots, onions, and garlic anytime within 12 hours before you're ready to cook. If it's going to be more than 30 min before you actually put the dish together, submerge the chopped veggies in water (if more than an hour, put them in the fridge). They'll stay fresh, and chopping ahead of time will dramatically reduce your work later (aka - make this recipe attainable for those of you who work or have toddlers) - as it's really the most time consuming bit of the prep.
*Prep your area prior to working with the chicken. Raw chicken is no child's toy, so make sure you have out all of the aforementioned gear and ingredients before you start cutting.


note - size of veggies at approx 1 inch

Roast Chicken with Root Veggies

1 med size chicken, whole including giblets (the innards - yuck!)
3 large potatoes (any kind is fine, I used Russet because they're cheaper - red, yellow, or yukon would also be perfect. Fingerling potatoes would be A+ for presentation, taste great, and minimize your cook time) 
4 med size carrots (again, baby carrots would be fine, and no chopping required) 
1/2 large onion 
4-6 cloves fresh garlic
salt (approx 3Tbs) 
olive oil (approx 4Tbs) 
rosemary (optional)

Gear needed
* Stove-top/Oven-proof pan with lid - If you don't have one, a skillet and a 9x13 baking dish will work just fine. But if you have a stainless steel stock pot, or a Dutch oven - now is your time!
* Knife
* Plate/small bowl for giblets/excess chicken (to save for making stock later)
* Large plate for prepping chicken

Preheat the oven to 400F.

Instructions:

Remove the chicken from it's packaging. Remove the giblets and any large excess portions of fat from the chicken, set aside. Note - depending on what kind of chicken you buy, the giblets may be nicely pre-packaged in a separate little bag, or alternatively, may be inside the chest cavity of the chicken. If this is the case, remove the giblets by reaching inside the back-end of the chicken. If your chicken has any residual feathers or dirt (which it shouldn't, but occasionally happens) just rinse the whole thing off under the tap for a minute - not to worry! 


 Set the chicken on a large plate and begin pulling the skin back from the meat - gently. The goal is to create space between the skin and the meat but do not remove the skin from the chicken completely. You don't need the skin sagging away from the meat, just open enough to slide in some garlic gloves, salt, and if you have it on hand - rosemary.

Make sure you separate the skin from the meat on both sides of the chicken, and around the wings and legs as much as possible. Once the skin is separated, but not removed, slide some sliced garlic, salt, and any other herbs of your choice under the skin. You don't want to stuff the area between the skin and the meat - just put some little bits of flavor inside.


Why are we doing this? Well, because it's delicious. The skin helps hold in the natural moisture of the meat (dried out chicken is terrible), and adds a nice little bit of extra flavor because of the amount of fat in the skin. The garlic, salt, and other herbs of your choice will help infuse the meat with a nice flavor - but because we didn't put in too much, won't overpower it.

Ok - if you made it this far and you're still interested in doing this meal - stop for a minute. Pat yourself on the back, go pour yourself a glass of wine (even if it's only 3pm) - you're an amazing cook. Anyone who's willing to do this, is an amazing cook. Even if you ruin it your first try :)

If you're not willing to do this, and you're still reading - go pour yourself a glass of wine, drink it. Pour yourself another. Now read this again, and try!! You can do it, and if you fail on the skin separating bit, you can still toss the chicken in the oven with the veggies for a couple hours and create an amazing meal!

Alright - back to the recipe.
So pretty!

Take some of your chopped root veggies (and any remaining garlic), and put them inside the cavity of the chicken. It doesn't need to be stuffed, but full - these will also help create a wonderful sweet flavor in your chicken. Extra onion inside the chicken is a great idea.

Put 1-2 Tbs of olive oil in the bottom of your stockpot and pre-heat on the stove top. Place the chicken directly in the pot and allow the bottom side to brown for approx 30seconds. Using your hands (as the chicken shouldn't be too hot yet), grab the legs of the chicken and gently pull the chicken up from the pot, turn over, and place back in the pot in order to brown the other side. Again, brown for about 30 seconds.

Un-browned side

After the flip - browned.

Note 1 - if you are doing this without a stove-top/oven friendly pot, brown the chicken in a skillet, then transfer to your baking dish. Nothing else is different.

Note 2 - if the above step sounds too hard, skip it. Put the olive oil in the bottom of the pot, pour in the veggies, and plop the chicken on top. Drizzle it all with a little bit of extra olive oil, salt, and (if you have it) fresh ground black pepper. Continue with the below directions.

Turn off the heat, using a long wooden spoon (or utensil of your choice) slightly lift the chicken from the pot and put some of the root veggies underneath. Let the chicken rest on top of the root veggies, and pour any remaining veggies over the chicken.


Once your chicken and veggies are all in the stock pot, cover the pot tightly (preferably with a lid, though if you don't have a lid, foil will suffice - be generous)

Place the pot/Dutch oven/baking dish in the oven (towards the middle, if possible) and let cook for approx 2 hours (depending on the size of your bird, it may be closer to 1 1/2 hours).


While I waited, we made some of those delicious chocolate chip oatmeal cookies I promised to make this week. Recipe here. Then we ate some. A lot. Yum. Only complaint on this recipe - dough is so stiff!!! Next time, I may melt the butter, or dramatically soften it. (note - I made them again and melted the better. Totally different cookie. Much chewier, much less crunchy. Still delicious.) Also - 1hr 5min time includes all the baking time - which isn't really active prep time, in my opinion...


Anyway - while you're eating cookies...Check the chicken every 30 min or so, being sure there is some liquid in the bottom and nothing is burning. The chicken and veggies (combined with the olive oil) should produce enough liquid on their own. However, if your pot looks really dry on the bottom, add 1/2 c water, recover tightly, and check again in 15 min.

After about an hour - hour and a half, check to see if the chicken is done. You can either use a meat thermometer inserted into the breast (poultry is done at 180F, though some say 160F), or you can just use a paring knife to cut into the breast and check the color of the meat. You want white meat, not pink, but some juices are fine - great, actually.

If your chicken isn't as brown on top as you'd like it to be, uncover it, and cook again for 5-10 min - that should the trick, and not dry out your chicken.

It's finished!!!

Once the chicken is done, remove the pot from the oven and let cool for a few minutes. Using a meat fork (or salad fork) and some other sturdy utensil, lift the chicken from the pot and place on a platter - carefully. Pour the veggies around it, and viola - you're a professional chef!


If you like - garnish with some fresh rosemary and fresh ground pepper.

Enjoy with white wine (if you like white wine - I much prefer red), artisan bread (meaning, not sandwich bread), and side salad. We're having Rosemary Bread (bought at the store) and spinach salad (which I'll do a recipe for later).

Now, even though this is incredibly long - this is important as a last note.

Please, please read the upcoming entry on Chicken Stock before you clean up from this meal. You can absolutely use every single bit of that chicken you bought, and fairly effortlessly. If you've made it this far, you owe it to yourself (and that chicken) to do a little bit more work and make the most delicious chicken stock you've ever made.

When we do Roast Red Pepper and Tomato Risotto with Spicy Sausage next week, you'll be glad you did. The Chicken Stock made from this chicken absolutely makes it.

Alright - happy eating and impressing!

Ps - if you wanted a smaller version of this, or an individually plate-able dinner, try this same recipe but with cornish game hens. I've never done it, but the results would be fabulous. Definitely use fingerling potatoes, baby carrots, and pearl onions if you do.

Saturday, January 12, 2013

Homemade Granola

Granola is delicious. Homemade granola is even better, and it costs next to nothing to make. For about $2, you can have 2-3 boxes worth of store bought granola. And, it's incredibly hard to mess up.

Here's your recipe:

Homemade Granola

Preheat the oven to 350F & butter/grease a 9x13 baking dish

In a large bowl combine:
10c outmeal 
1c wheat germ 
1/2c flax seed 
3 Tbs cinnamon
2 tsp nutmeg
2 tsp allspice

Mix thoroughly.

In a small saucepan combine: 
1 stick/c butter
1 1/2 c brown sugar (you could do less if you wanted less sweet granola) 
1/4 c honey 
2 tsp vanilla (the vanilla will cause the mixture to bubble a bit, so be sure you're using a big enough saucepan, or have a spoon ready to stir)

Heat, stirring often, until ingredients are melted into a thick syrup. Pour over dry ingredients. Stir thoroughly until the dry ingredients are equally coated with the sauce. 

Pour into a buttered 9x13 baking dish. Place in the oven, towards the middle of the oven, for 45 min - stirring every 15 min. If the granola starts to look too brown, or burn on the bottom, turn down the heat or remove the granola from the oven. 

Let the granola cool completely before transferring to an airtight container. 

Note: if you want chunkier granola, don't stir at all after removing from the oven after baking. Let cool completely, then break apart as you transfer to a container/ziploc bag. If you want un-chunky (smooth?) granola - stir thoroughly during the cooling process.

Serving suggestions:
With milk
With yogurt and fresh fruit (my kiddos favorite)

Variations:
Add dried fruits or nuts before or after the baking process
Add any dried flour/grain with the dry ingredients/in place of some of the dried ingredients- flaxseed, wheat germ, wheat bran, bran flakes, leftover cornflakes, crushed Weetabix. The beautiful thing about granola is you can switch out/add ingredients without much cause for alarm or fear of disaster. I often finish up all those annoying bits of leftover cereals (even raisin bran and rice crispies) in my granola - really the sauce is the most important bit. And with enough cinnamon, honey, and butter - who can go wrong?!

If you come up with a great variation, I'd love to hear about it!

Enjoy :)

Meal Planning 101

If we're really going to do this year of meal planning thing, I should give you a couple pointers on meal planning, and a bit of an insight into my 'creative process'.

Firstly - don't bite off more than you can chew. If you work full time, figure out ways to do crock pot meals, meals in advance, prep in advance, etc. Definitely have those 'bad day back-up' options. If you have little kids, figure out the best time of day to do your meal prep. In our house - predinner hour is children witching hour and so I do as much of my dinner prep during morning 'happy hours' as possible. I also find I can do a lot of prep during lunch time. For my own sanity, I try not to be in the kitchen during nap time - nap time is my time (to watch shows on hulu, eat a lunch in peace and quiet, take a nap, work out, etc).

Secondly - make sure you have all the necessary ingredients in the house before you start cooking. Nothing derails a good meal like not having the ingredients. On a similar note - familiarize yourself with good substitutes (applesauce for oil in baking, for example) so if you do find yourself missing an item you aren't paralyzed with fear/threatened with a shopping trip while the family sits hungry. Lastly - make it a goal to eventually be able to tell which ingredients are crucial to a recipe. Lots of recipes have lists and lists of ingredients, but some of them can be left out without dramatically changing the final product too much (obscure seasonings fall into this category quite often, though definitely not always). This will also save you last minute shopping trips to pick up sesame oil or dried fennel.

Thirdly - plan meals that have ingredients in common. If you're feeling like it's a week for potatoes - embrace the potato theme (homemade french fries, baked potatoes with toppings, mashed potatoes, potato soup, etc). Things are cheaper in bulk, so if you can plan a week of meals with similar ingredients it will save you space, money, and time.

Fourthly - leave a night or two blank. Stuff always comes up, some days cooking is just out of the picture and going out/pizza delivery is an absolute must, there are always more leftovers than you think there will be...there is absolutely no reason to plan 7 meals for 7 days. 4-5 meals for a week (for a family of 4 that hosts others a couple times a week) is perfectly adequate.

One note, before I introduce you to this week's meal plan and shopping list - I usually cook enough for 4-8 adults. Why? I love leftovers. Not always the next day (though my kids get them for lunch, and the hubby takes them to work) but because enough leftovers means another weapon in my arsenal of 'bad day back-ups'. While it may take 20% more time to make a bigger batch, it saves you the other 80% you would spend if you made the same meal twice.

This week's meal plan....so excited!!! 

Theme: chicken & root veggies (potatoes, carrots, sweet potatoes, onions, parsnips)

Sunday - Roast Chicken
(this meal will be the base/provide ingredients for several other meals, don't skip it)
* Roast chicken with potatoes, onions, carrots
* Rosemary Bread (Cosco sells an amazing rosemary bread - and while I've made some good ones, this week we'll use theirs...plus, it, like everything at Cosco, comes in a pack of 2 and stays in the freezer quite well for a month or two)

Monday - Salad Night
* Roasted Root Veggie Salad with honey-dijon mustard dressing (salad on Monday night because I'm doing my shopping over the weekend, and don't want the fresh greens to go bad)
* Rosemary Bread (we won't finish the loaf on Sunday night - let's use it again!)

Tuesday - Indian Food 
* Palak Paneer (creamed, spiced spinach with homemade cheese - yup, we're making cheese. You won't believe how easy it is. I mean, it's stupid easy)
* Chicken Tikka Masala (we're using leftover chicken from Sunday night) 
* Naan (I'm making mine this week, but if you want to buy some - Trader Joe's sells great ones. Avoid frozen ones, if you can. The non-frozen ones will stay good on the shelf for a week or so, and in the fridge for a couple weeks, I think)

Wed - Leftovers

Thursday - Soup Night!
* Sweet Potato & Chili (we're using chicken stock we'll make from Sunday night's chicken)
* Rosemary Bread - we'll still have some leftover, but if you don't, just use whatever bread you prefer

Friday - Freezer Meal 
* Pasta with white sauce, artichoke heats, and bacon 
(If you don't already have this in your freezer...which you probably don't, just make sure you get the ** items on the grocery list. I'll put the recipe up for it on Friday to have in our arsenal for later) 

Saturday - Open Night

Non-Meal/Staple Items

Homemade Granola
Greek Fruit and Nut Pastries
Chicken Stock 
Oatmeal Chocolate Chip Cookies

Our Breakfasts
Cereal
Eggs
Oatmeal
Bagels & cream cheese
Granola 

Our Lunches
Mac N Cheese
Leftovers
I have no idea what else...I hate lunches

It's a big week, but it should be so much fun! And while you may feel intimidated - this won't take you more than an hour a day to make. I promise. Promise. I dare you. Try it. (most days will probably only be 30 min max)

Shopping List:
# - items not required for this week's dinners, but good to have on hand for other meals/staples

Produce (I do my produce chopping at cheap produce markets, not at mainstream grocery stores where the prices are much higher. Do a yelp search for the nearest produce market near you) - 
Carrots (4)
Ginger (3" piece. I use mine in teas and other things, so you could get much less)
Spinach (large bag)
Arugula or other mixed greens (3c worth - approx)
Shallots (4) (if you have other onions on hand, those will do just fine)
Sweet potatoes (3)
Potatoes (3)
White onion (1)
Red onion (1)
Tomatoes (4)
# Lemon (2 large)
# Pears (6) # (4 of them are for just munching, 2 are for the soup)
# Apples (6)


Non-Produce
Whole chicken (yes, you need one with the bones and guts. Be brave!)
Bread (some yummy bread to go with soups)
Whole milk
Cheese Cloth (can be hard to find - try your local grocer, Michaels, or an international food store)
Flour (# if you're buying Naan)
Oatmeal (#if you don't want to make granola)
Bagels #
Yogurt - natural and vanilla (#vanilla is optional - my kids LOVE vanilla yogurt. You need the natural)
Confectioners Sugar (# if you don't want to do the Greek Fruit & Nut Pastries)
Eggs #
Chocolate Chips # (if you don't want to make the Oatmeal Choco Chip Cookies)
Cream


Already in my house (these really don't go bad, and add a lot to your kitchen's diversity/ability to meal plan & cook easy. Just like any art, cooking is a bit of an initial buy-in. But it's well worth it. Spices are cheapest at international food stores, and so far - I haven't found a big difference in quality between recognized name brands, and off brands. cheap is good. Buy honey and olive oil in bulk.):

Staples List: 
Garlic
Olive Oil
Cumin
Salt
Pepper
Turmeric
Corriander
Butter
Sugar
Vanilla
Baking soda
Baking powder
Honey
Flaxseed
Wheat Germ
Cinnamon
Cayenne Pepper

 If you're doing the initial buy-in, your groceries are going to exceed the $50-$75 we're going for this week...but I think the dinner specific items are well within the realm of reasonable for that budget. Of course if you go all organic, your bill will be more.

So...there you go! If you have requests on how I organize the meals/shopping list, let me know. I'm just getting started on this so nothing is set in stone.

If you decide to cook along with me, I'd love to know! And I'd love to know how your experience goes. A lot of my recipes will appeal more to confident cooks, but even if you're not a confident cook - I really think you can do it!

Off to get dressed and go to the grocery store!


Friday, January 11, 2013

Trying Out a Daily (almost) Food Blog

So...welcome back to my kitchen. It just relocated to Seattle, and has made a few upgrades:

* out with the non-stick, in with the stainless steel (If you're considering this, do it. And if you're going to do it, get your stainless steel at a restaurant supply store - much cheaper and still stainless steel. Sure beats mainstream store prices)
* out with the knife block, in with the Golden 3 (8in chef's knife, 5in paring knife, and 10in bread knife - after a month of this, I have yet to want another knife)
* immersion blender (I got this exact one at Cosco for $35) and mini-food processor - for the solid, and irreplaceable win. Your soup making will be revolutionized, and your chopping time cut by half.

Here are my food goals for the year:
* meal plan - every week. My lovely sister-in-law got me an amazing fridge-magnet meal planner and I am immensely enjoying it.
* salad night once a week
* vegetarian night once a week (salad night doesn't count, and won't always be vegetarian anyway)
* keep our grocery budget under $300 a month - I'd love to do $200 a month, but I think $300 is a little more realistic
* as much organic as possible
* as much from a humble "I live in a rental" garden as possible

So, here's my plan - every night I'll try and post a brief recipe (emphasis on brief, since this is an every night endeavor) and once a week I'll post our meal plan and shopping list. If you want to cook along with me, a day or week behind, feel free to. This won't be a blog with amazing pictures (though I'll try) and I'm quite sure I'll miss a few days, but I'm going to at least give it a shot.

Before we get started, and if you're new to my kitchen blog, let me give you a little bit of my 'chef' philosophy - I think everyone has potential to be a great cook, if you have a love for food. If food and eating fall in a sort of 'eh, I do it to survive' category - it will be much harder to be a great cook. To be a great cook, you must LOVE to eat.

Secondly - cooking, like any skill, sucks until you get good at it. But, if you stick with it, I promise you (yes you) can be a great cook. Just like any art, the right tools, supplies, and emergency back-up plans make success all the more attainable. With that in mind, my freezer usually holds some 'bad day back ups', and my pantry (currently a wire shelf from home depot) is always stocked with what I consider to be the essentials.

To spare you the bore of list of what's currently in my kitchen, I'll just make sure to include a list of "items already on hand" in whatever shopping list I put up at the beginning of the week - if I consider it an essential, I'll indicate it as such.

OK - enough details! To give you a glimpse at this past week - here was our meal plan

Sunday - Homemade tacos (which includes homemade tortillas, and usually includes homemade refried beans - but that didn't happen this week)
Monday - Lasagna with garlic bread and sauteed asparagus
Tuesday - Leftovers
Wednesday - Spinach Salad with hardboiled egg, walnuts, feta cheese, dried cranberries, and Trader Joe's Champagne Pear Vinaigrette salad dressing
Thursday - Roasted Tomato Soup/Bread
Friday - Crockpot Beans and Rice
Saturday - no plans

So, here's the scoop on tonight's dinner (I'll put up details/recipes on the above recipes whenever they are re-circulated in future weeks).

I wanted to try something with beans and rice, since so many cultures eat something along these lines as a staple.

Crockpot Black Beans and Rice 

2 cups homemade chicken stock (recipe to come at some point) 
1 cup dried black beans
1/2 large yellow onion, chopped
4 large cloves garlic, diced 
1 can corn, liquid included 

Combine the above in a crock pot and let cook on low for 2 hours. 

1 cup dry rice 
1 large can of whole cooked tomatoes
1 Tbs cumin 
1 tsp salt
2 cups water 

Add to the crock pot, stir thoroughly, and let cook for another 2 -3 hours. 

Viola - dinner. Done.

Be sure, if you're home, to check the amount of liquid periodically as beans and rice both absorb great amounts of water. If you're unsure, add an extra cup of water or chicken stock (my recommendation if possible) - the worst that will happen is you'll have a more soupy dish, as oppose to a dry one. If you add way too much - you've just made soup :)

Couple quick fix tips - though this recipe is pretty direct and chopping - free.
* use a mini food processor for the garlic and onions
* if you need to make this and leave home for 6 hours, toss everything in at the same time - being sure you leave plenty of liquid- stir thoroughly, and set your crock pot on it's lowest setting

I'll be serving mine tonight with Greek Natural Yogurt, homemade salsa, and possibly diced bananas. I'll let you know in the next post how it goes, and will retroactively add a pic to this post.