Sorry it's been so long! I'm trying to revamp my blog life...here's an attempt at putting up a new recipe each week.
SO - SAMOSA TIME!!! If you've never had a samosa, keep reading...then make this delicious recipe and the mango chutney recipe I'll put up next, call over some of your best friends, bust out a bottle or two or three of red wine and ENJOY!
When making samosas, please don't cheat and use puff pastry for the dough. It's just not the same, and you're better off putting in a bit of extra elbow grease. These aren't super healthy, and you're going to eat a lot of them - so the more calories you burn making them, the better.
For the dough, I'm just gonna refer you to this fantastic samosa recipe - I hope that's ok! Follow her directions for the dough - though I roll mine out a bit bigger, between 9-10 inch diameter (that's the width from one side to the other, for those of you who hated geometry). Cut as she directs, right in half. She folds hers in half, which works great. I've included pics below of the process I use. There are other methods, which you can do a quick search for, but the basic idea is to make an ice cream cone, put the filling in just as you would ice-cream, then seal the top.
Mix the above Filling ingredients together, making sure everything is mixed in well but taking care not to turn your delicate feta into too much of a schmear. Prepare the aforementioned dough recipe, rolling out your dough as if you're rolling tortillas.
Follow any version you prefer of folding - here are pics of my method (please ignore my horribly unmanicured fingers...a girl can only keep up with so much):
If
you have a hole, pinch it shut. If it won't stick, use some of your
flour paste to hold it shut. If you have a huge hole, consider using
some back up dough as a band aid - and use the glue to hold it in place
as necessary. Set aside. Prepare all of your samosas.
Pour enough sunflower oil into a deep pot for...you guessed it...deep frying samosa time!!! Once your oil is hot enough (drop in a little extra piece of dough to test. The oil should immediately start bubbling, and the dough should turn brown within 30 seconds or so) drop in as many samosas as can comfortably fit in the pan. You'll need to flip them after about 30 seconds, so take care to not overcrowd. Fry each samosa until both sides are a nice, golden brown - approx 30 seconds each side.
Remove and let excess oil drain off. I actually put a cookie sheet lined with newspaper under a cooling rack - works really, really well. Once drained, put in a dish with a lid - the extra moisture from the samosas cooling will help take away the unsavory over-crunch that can occur with deep frying thin dough.

Serve warm with homemade mango chutney & a glass of red wine. Or two. Enjoy!!!
ps - I know this seems like a brief recipe for what could be a complicated process...you can do it! Feel free to write with questions, and next time I make these, I'll try and take some pics to enhance this entry. Let me know how they turn out!!!
xo - sarah
SO - SAMOSA TIME!!! If you've never had a samosa, keep reading...then make this delicious recipe and the mango chutney recipe I'll put up next, call over some of your best friends, bust out a bottle or two or three of red wine and ENJOY!
 |
| Feta & Coriander Samosas |
When making samosas, please don't cheat and use puff pastry for the dough. It's just not the same, and you're better off putting in a bit of extra elbow grease. These aren't super healthy, and you're going to eat a lot of them - so the more calories you burn making them, the better.
For the dough, I'm just gonna refer you to this fantastic samosa recipe - I hope that's ok! Follow her directions for the dough - though I roll mine out a bit bigger, between 9-10 inch diameter (that's the width from one side to the other, for those of you who hated geometry). Cut as she directs, right in half. She folds hers in half, which works great. I've included pics below of the process I use. There are other methods, which you can do a quick search for, but the basic idea is to make an ice cream cone, put the filling in just as you would ice-cream, then seal the top.
Ok, for the filling:
Feta & Coriander (Cilantro) Samosas
yields 16-20 samosas
Filling:
2c crumbled feta cheese
1 medium sized red onion, sauteed in 1Tbs butter
1/3 c chopped green onions (the smaller, the better)
2-3 Tbs fresh lime juice
2/3 c chopped fresh coriander (cilantro)
1 Tbs powdered cumin
Paste:
2 Tbs flour
2 Tbs water
* combine into a paste - should be the consistency of glue, set aside.
Mix the above Filling ingredients together, making sure everything is mixed in well but taking care not to turn your delicate feta into too much of a schmear. Prepare the aforementioned dough recipe, rolling out your dough as if you're rolling tortillas.
Follow any version you prefer of folding - here are pics of my method (please ignore my horribly unmanicured fingers...a girl can only keep up with so much):
 |
| Cute your samosa round in half. Then, taking the bottom corner closest to you, fold the dough diagonally up to the opposite side (see pic below). |
 |
| Using your finger, spread a bit of the flour paste across the edge closest to you. |
 |
| Fold the opposite side across so your straight edges line up, press gently along the seam. |
 |
| Open up the top of your samosa, leaving good room for putting in the filling. Using a spoon, put in the filling (sorry no pic!). |
 |
| Spread a bit of flour paste across one side of your top opening. |
 |
| Pinch your edges shut securely. |
 |
| Almost ready for the pot! just needs edges trimmed. |
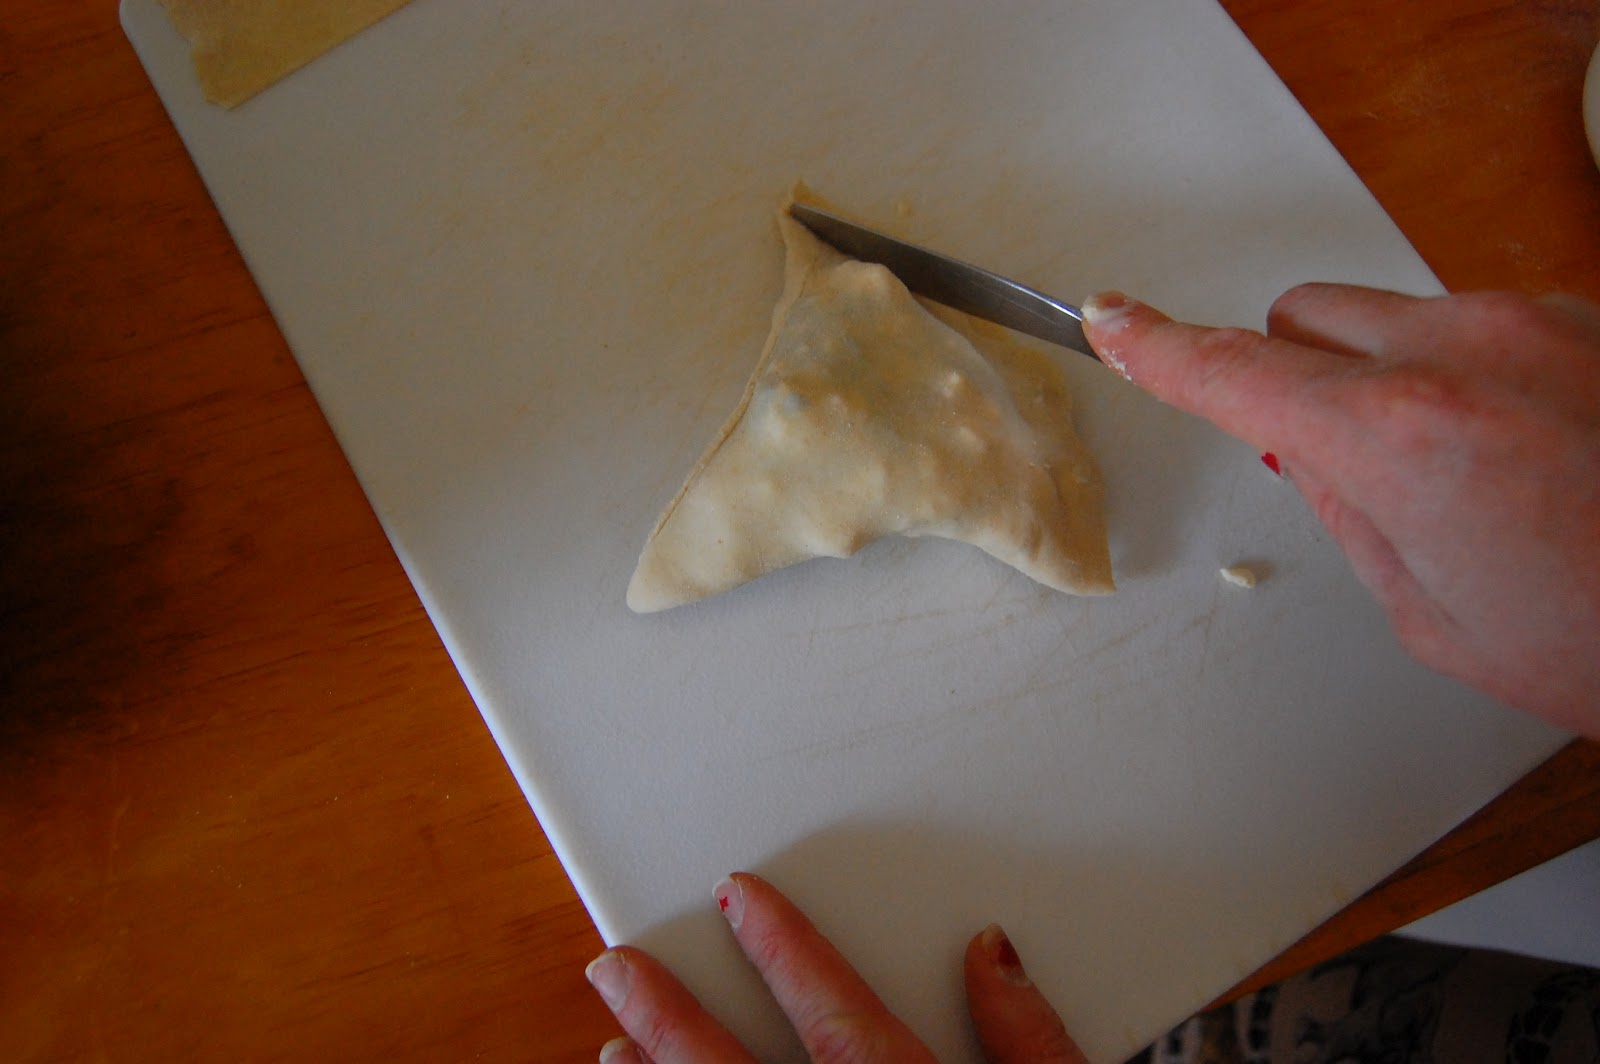 |
| Trim off any excess edges - being sure not to re-open your nicely sealed samosa. |
Pour enough sunflower oil into a deep pot for...you guessed it...deep frying samosa time!!! Once your oil is hot enough (drop in a little extra piece of dough to test. The oil should immediately start bubbling, and the dough should turn brown within 30 seconds or so) drop in as many samosas as can comfortably fit in the pan. You'll need to flip them after about 30 seconds, so take care to not overcrowd. Fry each samosa until both sides are a nice, golden brown - approx 30 seconds each side.
Remove and let excess oil drain off. I actually put a cookie sheet lined with newspaper under a cooling rack - works really, really well. Once drained, put in a dish with a lid - the extra moisture from the samosas cooling will help take away the unsavory over-crunch that can occur with deep frying thin dough.

Serve warm with homemade mango chutney & a glass of red wine. Or two. Enjoy!!!
ps - I know this seems like a brief recipe for what could be a complicated process...you can do it! Feel free to write with questions, and next time I make these, I'll try and take some pics to enhance this entry. Let me know how they turn out!!!
xo - sarah
Hi Sara! This sounds delicious, can't wait to give it a try :)
ReplyDeleteThanks! Hope you enjoy it - let me know how they turn out :)
Deletebechne
ReplyDelete